Project to replace the OEM CD changer in the boot of my convertible E46 BMW with a Linux mp3 player and the IBUS
Sourceforge project page with CVS
Created a bracket to hold the VoomPC case. I used a bit of aluminium sheet (about 1-1.5mm thick) and bent and cut it to resemble the OEM bracket the holds the cd changer. It is basically an L shape in cross section, has 4 holes in the base and 5 holes in the side. One hole in the side is for securing to the car and the other 4 are for mounting the VoomPC case.
I mount the case with the slots towards the front of the car, and in this configuration I can get reception with a pcmcia card (actually a CardBus Belkin FD6020/atmel) at my access point. The signal is travelling through the sheet metal body work of the car, the metal garage door, and a double cavity wall. That's good news for me as I don't have to get a card with a seperate aerial. I mount it this way round as the car hireness is not long enough to reach the IBUS interface the other way round without an RS232 extension cable. An extension cable means more joints which means more places for failure.
I use the yellow/red light cluster wire for the M1-ATX ignition signal. It gets power when the car is unlocked via the remote, and loses power either after a certain timeout if the car is not started, or when the car is locked. This gets the computer booting as soon as possible. I assembled the EPIA MII 6000, with the 80Gb drive and M1-ATX power supply. No problems with the assembly, although the connector for the drive is quite tight against one of the power supply mounts.
OS Installation
I went for Slackware as that's what I'm used to. I've been using Slackware since I got into Linux (a.out days 94/5?) and I dont see any reason to change. I like the fact that its not bloated, and has been very stable for me. The latest version was 10.2 so I downloaded the first 2 isos for that and burned them to CD (I think in the end I only needed the first one). Initially I intended to mount the 2.5" drive in my desktop and install all the OS files using that machine, then just transfer the drive to the EPIA, but there doesn't seem to be an easy way to do that, so in the end I installed the drive in it's final location in the EPIA and pulled the DVD/CD drive from my desktop and put that in the EPIA. Once I did that installing the OS was easy. The onboard sound and Ethernet card were detected fine. Not that I cared that much as I was going to put my own kernel in anyway.Kernel installation
Next step was to build a custom kernel. I did this to help reduce the boot time(more later). I want only the necessary stuff to get the cdemulator up in the kernel, everything else can go in modules and be loaded after the emulator has started. Even the sound can go in modules - I just want to be able to respond to the IBUS poll as soon as possible. I'll post the .config when I get the opportunity. Not being any reason not to, I went for the latest, 2.6.15.4Other packages
I installed this other stuff:- acpid - not in the base Slackware, or else I missed it. With this running the EPIA will shutdown gracefully when the ignition is turned off (in about 10 seconds). But more importantly I can run my own command on the power button signal. I intend to use this to delay the shutdown to allow syncing of media and downloading of other stuff like email.
- lm-sensors and the vt1211 driver - the vt1211 driver is not part of the 2.6 kernel yet but you can get it from here. This will allow me to show the cpu temperature in the head unit.
- module-init-tools 3.2.2 - Need this to get the hotplugging working for the pcmcia wireless card. I'm using a Belkin FD6020 v2 card (atmel chipset) for testing. I added an alias to eth1 in modules.conf and modified the rc.inet1.conf file to make the wireless element number 1. Not really sure why this is necessary but it must be something to do with the way slackware sets up the interface. It seems to want the same number in its array as it has in eth1
- The latest pcmcia package, forgot what its called, will update this later.
Booting
The goal is to have the emulator up and running when the radio unit polls it. This is going to be difficult. Right now I've done the following:- Turned off as much as possible in the BIOS: splash screens, unused devices etc. The BIOS is still the biggest enemy in getting my boot time down.
- Turned on the compact setting in LILO, not sure if this helps much, but ddoesn't seem to slow it down
- Made the kernel as small as possible
- Start the cdemulator as soon as possible. I am going to try to start it after the disc is mounted read-write. The sound modules are not installed yet, but that shouldn't matter too much, worst case is that there will be a short delay while they load, but in reality they load so soon after this point the delay will not be noticeable compared to the rest of it
Linux itself boots up to the cdemulator in about 5 seconds, so thats not too bad. But even thats longer than it would normally take to turn on the ignition/crank/fire/listen to the normal cd.
To get some text to appear in the head unit/radio of my E46 I use the message :
0xc8 0xxx 0x80 0x23 0x42 0x07 "text"
which is normally used by the telephone system I suppose. 0xxx is the length of the packet as per normal Ibus message format. But will do for me to display menu navigation stuff and ID3 tags etc.
Ordered a bunch of stuff from www.linitx.com. They shipped it same day, so this looks like a good company. I bought :
- VIA EPIA MII 6000 Eden M/board - I wanted fanless and you don't need a lot of power for mp3 decoding
- Voom PC case - no experience with this but should be ok as its designed for cars
- 2.5" IDE adapter
- Fujitsu 80GB 4200 rpm 2.5" drive - MHT2080AT (MHT2080AT) - should be enough space for me
- M1-ATX 90W Intelligent Car PSU (M1-ATX) - more than I need, but I wanted the intelligent bit. I shut down the computer after syncing with the media server in the home, but the auto power off if the voltage drops too low as a nice safety thing. If it shuts down with enough juice left to start the car that is.
Must do some reading on the LinuxBios project and the DiskOnChip stuff as I want a really fast boot, and this promises sub 5 seconds.
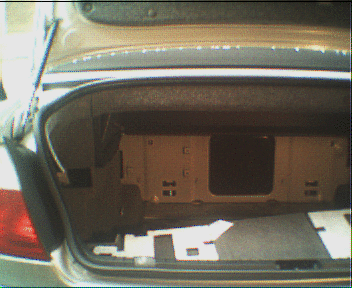
How to get at the cables for the cd changer:
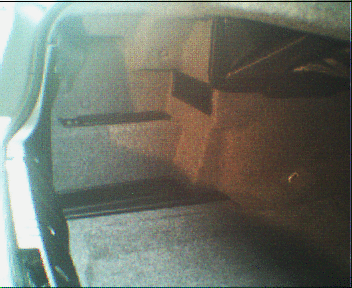
Remove the bottom black plastic tray on the right below the changer cover. You will need to remove the 2 rivets. There is a special BMW tool for this, but I used a pair of flat screwdrivers and had no problem. Be careful after removing the rivets, if you try to remove the tray the insets will popup and fly somewhere- which is what happened to me. I guess you could remove them first with some small pliers of pick them out with a screwdriver. You should now have something like the picture below. Still no sign of plugs to remove from the changer so have to remove more stuff.
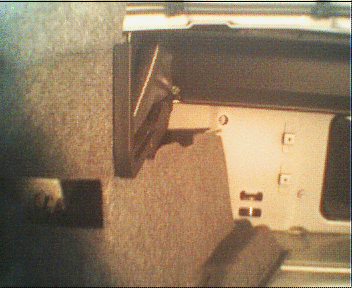
 I removed the box to the right of the changer next. It has 6 tabs which need to be lifted in to the centre of the box and
the edge of the box lifted past the trim. Its easy, start with the inside side, inside top and bottom and then the oustide.
Having removed the box I'm not sure its necessary, anyway it's eliminated as a possible trouble maker.
I removed the box to the right of the changer next. It has 6 tabs which need to be lifted in to the centre of the box and
the edge of the box lifted past the trim. Its easy, start with the inside side, inside top and bottom and then the oustide.
Having removed the box I'm not sure its necessary, anyway it's eliminated as a possible trouble maker.
 Next carefully remove the 2 grey rivets in the trim on the side and remove the light cluster which just unclips and pulls
out. You can disconnect it completely if you depress the tab on the clip and pull it off.
Next I pulled the back trim out. It has no clips and I just worked it from the bottom corners first and lifted the bottom
out tipping it up at the same time. Below you can see it remove with the back lying face up.
Next carefully remove the 2 grey rivets in the trim on the side and remove the light cluster which just unclips and pulls
out. You can disconnect it completely if you depress the tab on the clip and pull it off.
Next I pulled the back trim out. It has no clips and I just worked it from the bottom corners first and lifted the bottom
out tipping it up at the same time. Below you can see it remove with the back lying face up.
 Next I removed the top thin bit of trim the goes between the left and right trims. It has 3 grey rivets.
Start by pulling the side trim out from the back.
Next I removed the top thin bit of trim the goes between the left and right trims. It has 3 grey rivets.
Start by pulling the side trim out from the back.
 Work it out from under boot rubber trim, and around the sheet metal near the
light unit. The trim is in a grove in the black plastic trim thats at the back of the boot. I just prised it out of that
groove as I removed it. You could remote the black plastic trim completely (looks like a couple of M10 nuts and some more
rivets) and that might make it easier to wiggle the side trim out.
Work it out from under boot rubber trim, and around the sheet metal near the
light unit. The trim is in a grove in the black plastic trim thats at the back of the boot. I just prised it out of that
groove as I removed it. You could remote the black plastic trim completely (looks like a couple of M10 nuts and some more
rivets) and that might make it easier to wiggle the side trim out.
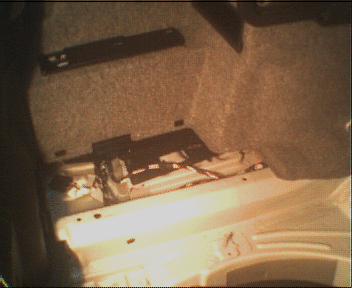
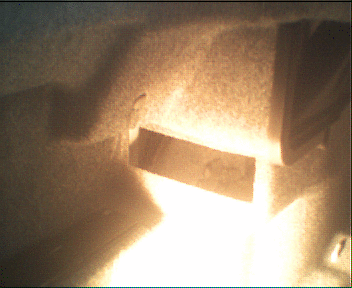
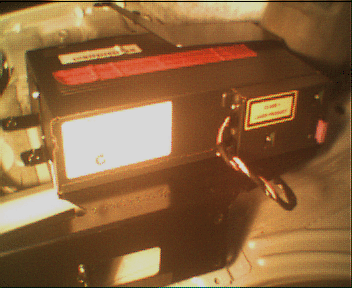
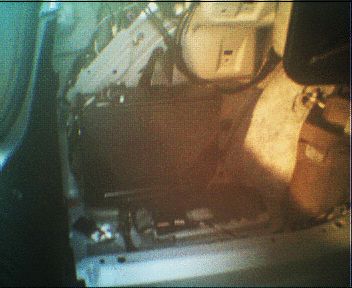 Now undo the 5 M8 bolts holding the changer case (4 in the base plate and one on a side strap). You will then be able to see
the two connectors. The one with the three wires is the IBUS (I presume) and the other the audio signals.
Both clips seem to squeeze and pull out. Don't forget to eject your cds before you remove the power!
Now undo the 5 M8 bolts holding the changer case (4 in the base plate and one on a side strap). You will then be able to see
the two connectors. The one with the three wires is the IBUS (I presume) and the other the audio signals.
Both clips seem to squeeze and pull out. Don't forget to eject your cds before you remove the power!
 Now to test my new interface
You have to plug the eedesignkits interface into the car for it to be recognised by Windows: it must take its power from the car, not the computer.
I installed the drivers from http://www.ftdichip.com/Documents/InstallGuides.htm and followed those instructions. Simple.
It appears as COM port 4 on this laptop, and using the IBUS monitor software from the BeBox project on sourceforge.net I am getting data when I open the door and turn on the lights, so that's good.
Now to test my new interface
You have to plug the eedesignkits interface into the car for it to be recognised by Windows: it must take its power from the car, not the computer.
I installed the drivers from http://www.ftdichip.com/Documents/InstallGuides.htm and followed those instructions. Simple.
It appears as COM port 4 on this laptop, and using the IBUS monitor software from the BeBox project on sourceforge.net I am getting data when I open the door and turn on the lights, so that's good.
 Scarry
 Dylan Alexander
 Brandon Sebastian